Overview - editing / adding a Landing page
Firstly you must decide what section of the HEA site you are adding the landing page to. At present all landing pages are done, so it is likely that you are editing a landing page.
If you are adding one, you firstly go to the section of the website that you want to add the page to.
You then change the page format to ‘Landing page’. You then must enter a Title in the title box.
Editing an existing Landing page
- Navigate to the section where the landing page you want to edit lives.
- Every Landing page has an ‘Intro Box’. These must have a small succinct sentence.
- The ‘Intro Box’ will normally have a CTA. Generally this leads to the overview page in this section.
- The choice with the CTA’s is: None / Internal Link / File Download / Full/External Link
- The Landing page boxes will be arranged below.
- You can change the order of them by dragging them on the left hand side, where the number is.
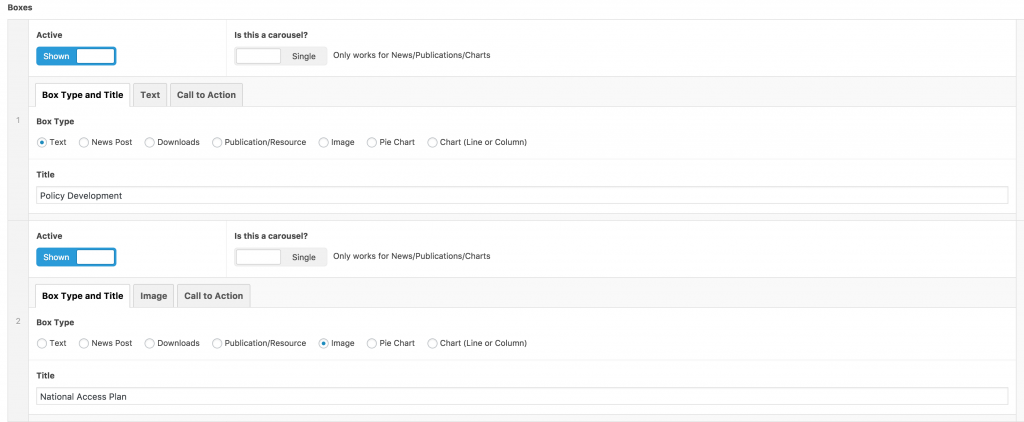
- You can use these boxes to show just one type of content or you can make them into a carousel that shows three segments of content.
- You make them into a carousel by clicking the button underneath ‘Is this a carousel?’.
- You then decide what type of box you want. Please see links below for each type.
Adding / Editing a Text box in a landing page
- Choose Box Type: Text
- Please note you can add an image to a text box. The image should be square and ideally 1000 x 1000 px.
- You then add the text in the text box.
- The last tab to have content entered into is the CTA tab. Again you choose what type of CTA this is. It can be None / Internal Link / File Download / Full/External Link
- In general it is an internal link and you can type in the page and it should appear in the search.
- You can change the text that appears in the CTA text area to anything. In general it’s ‘Find out more’.
Adding / Editing a News box in a landing page
- Choose Box Type: News
- Your choices here are: Choose a post / Latest by Category / Latest by Tag / Latest from All
- In general you will be using the Category choice.
- The latest news post for that category is then filtered into that box.
- You can choose a specific post if required.
Adding / Editing a Download box in a landing page
- Choose Box Type: Downloads
- Click Add Download on the right hand side.
- Give the download a title. If you don’t it will take the name of the file.
- You either use a file that is already in the media centre or you upload a new one.
Adding / Editing a Publication / Resource box in a landing page
- Choose Box Type: Publication / Resource
- Your choices here are: Link to item in Resources / Upload a new file / Latest Publication by category
- If you choose to upload a new file, the system will ask you to also upload an image.
- Image should have a height of 400 px. They should be just the cover. If they are A4 they will end up at 400 × 566 px.
- Add the text you want in the ‘Download Link text’ box.
Adding / Editing a Image box in a landing page
- Choose Box Type: Image
- You can add text in a text box if required.
- If you want to add the Map animation to a box this is the type of box to use. You will see there is a check box for that.
- The only type of CTA that happens in this page is a link to an internal page. So, you must choose a page to link to.
Adding / Editing a Pie Chart box in a landing page
- Choose Box Type: Pie Chart
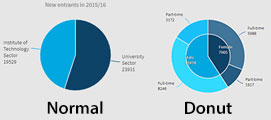
- “Normal” and “Donut” charts are illustrated below. A Donut chart can effectively have two charts shown at once, to show another level of data
- Chart Title is optional and will appear above the chart
- Chart Subtitle is optional and will appear below the chart
- Choose a unit for the figures
- Click Add Row to add Slices to the pie chart. Enter a title and figure and optional colour for each slice.
- Add Drilldown will enable a sub set of rows to be added.
On a Normal pie chart this will result in a clickable slice that reveals another pie chart.
On a Donut chart, the intital set of rows will populate the inner pie chart, and the drilldowns appear as outer layer.
Adding / Editing a Chart (Line or Column) box in a landing page
- Choose Box Type: Chart (Line or Column)
- Click Add Content, and select Chart (Line / Column)
- Select whether this is a Line or Column Chart.
- Under Unit Symbol select a unit for the figures as entered
-
Y axis title (Left) adds a title to the left of the left vertical axis
- Two Y axes will enable rows of data to align to a right vertical axis. A title can be added for this axis to appear to its right.
- Number of data points controls the amount of points/columns along the horizontal axis
- Add Labels for the data points
- Click Add Row to add data – Add a title for the row, an optional colour for the line / column(s) (otherwise a preselected palete will be used)
Each figure in a row will correspond to a data point on the horizontal axis as created in step 7